


HDR Tutorial
Slideshow by misterken
a tutorial on high dynamic range digital photography
1663 views since February 25, 2008.
Get a link button for this slideshow »
Make and share your own slideshow »
1 of 36
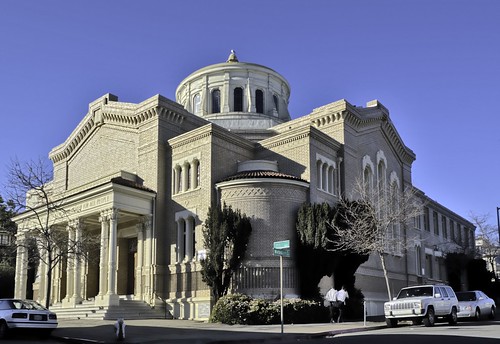
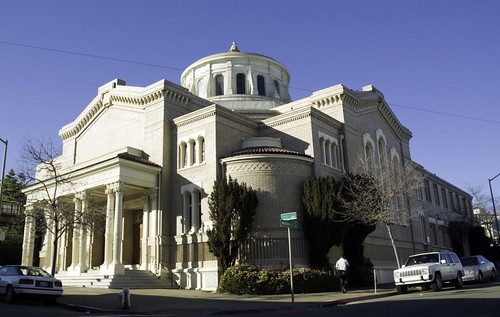
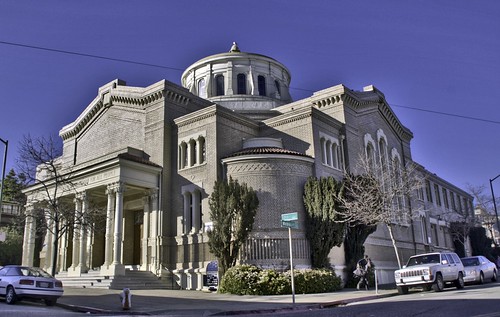
5001_4 Temple Sanai HDR SH FDLC
Five photographs from +2EV over exposed to -2EV under exposed were merged with Photoshop CS3 to create this single HDR image. All shots were taken on a sturdy tripod to capture a series of images that differed in exposure only (except for the guy who walked through the scene). After adjustments with curves and Shadow/Highlights, the image was cropped and "architecturally straightened" using Photoshop.
Photo by misterken
2 of 36
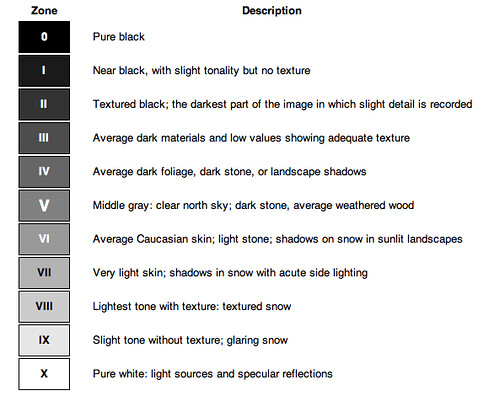
Adam's Zone System Descriptions
The Zone System was developed in 1941 by Ansel Adams and Fred Archer. In the Zone System, a tonal range is divided into eleven 'zones' from pure black (0) to pure white (X).
High contrast scenes exceed the dynamic range of film, print paper, and the digital camera.
The Zone System and HDR are all about getting more tonal range into an image that can be accomplished from a single exposure.
For more info on the Zone System see this article in Wikipedia. For more info on High Dynamic Range see this article by Norman Koren.
Photo by misterken
3 of 36
Mapping Zones to Photoshop Curves
An 8-bit digital image has a bit depth of 0 at Zone 0, 128 at zone V (middle gray), and 255 at Zone X (pure white). Note that Zone 0 has a reflectance of 0%, Zone V (middle gray) has a reflectance of 18%, and Zone X has a reflectance of 100%.
If the contrast range exceeds 10 zones, the photographer must choose to either blow-out the highlights or block-up the shadows... or use multiple exposures and merge to a single High Dynamic Range (HDR) image.
Photo by misterken
4 of 36
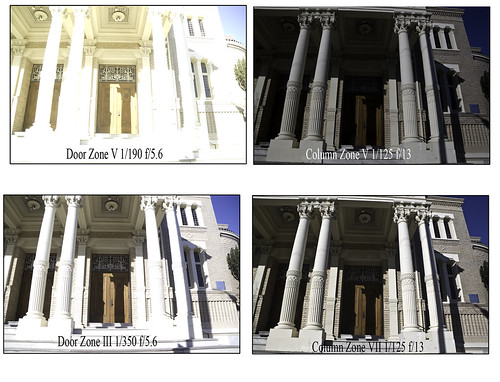
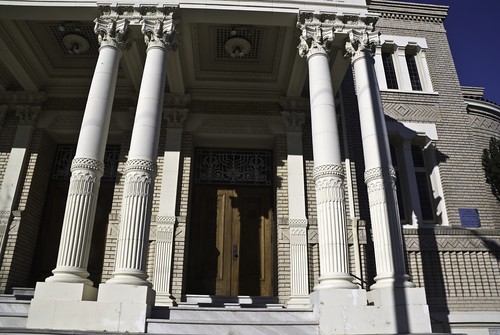
4981_4984 Covering the Zones
The (spot) meter ALWAYS gives settings for Zone V (middle gray). The two images at the top are in zone V for the shadow on the door (left side) and columns (right side).
The exposures after offsetting for the visualized Zones (III for shadow on door and VII for white of columns) are the two on the bottom. The bottom two images were merged in CS3 to HDR to yield proper highlight and shadow detail.
Photo by misterken
5 of 36
4984 Door Shadow - Zone III
This image was exposed to place the shadow on the door in Zone III (ISO 100 1/350 f/5.6). I first metered on the shadow to place it in Zone V then decreased the exposure by 2 EV. Note that the column highlights are mostly blown out.
I recommend using a tripod (I frequently don't). Exact registration of individual exposures allows the HDR routine to properly align the images. If you don't have a tripod, brace yourself against a sturdy object and shoot at high speeds. I may repeat this admonition later.
Photo by misterken
6 of 36
4981 Column Highlight - Zone VII
This image was metered on one of the columns for Zone V then the exposure was increased by 2 Ev for Zone VII (ISO 100 1/125 f/13). Note that shadow detail in the door is now lacking.
Photo by misterken
7 of 36
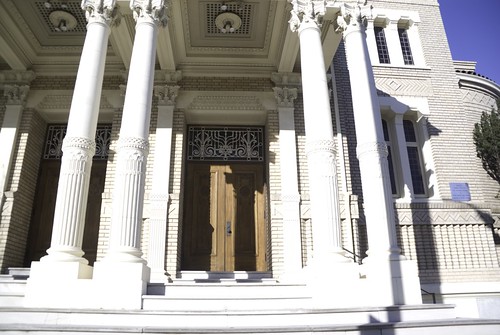
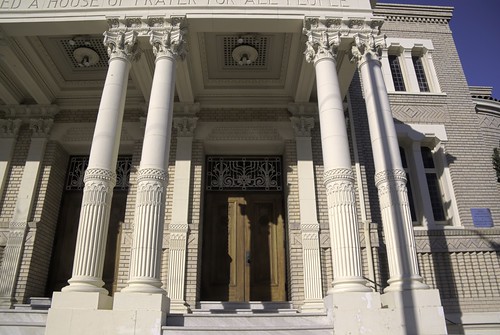
4965_67 Merge to HDR: Column VII Door III
The two images for the column in Zone VII and Door in Zone III were merged in Photoshop to a single HDR image. Following the creation of the HDR image, I used a Shadow/Highlights adjustment to further lighten the shadows and emphasize the area with the lights and the scrollwork. See this image with S/H adjustment.
Photo by misterken
8 of 36
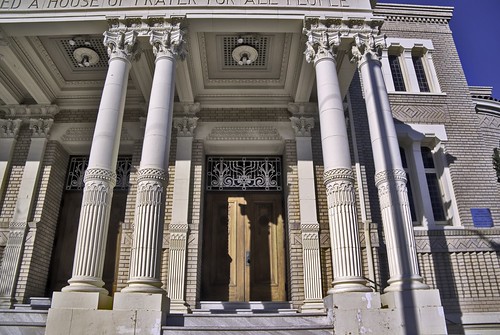
4965_67 HDR + Shadow/Highlights Column VII Door III
A Shadow/Highlights adjustment was used to create this image from the previous HDR .
Next: the process with specific instructions.
Photo by misterken
9 of 36
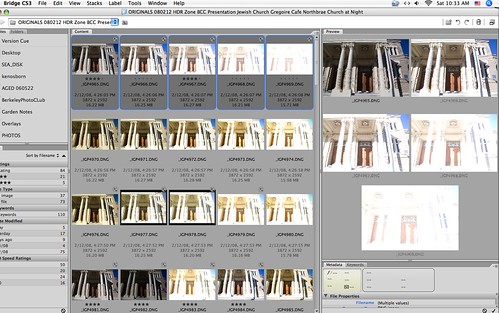
Step 1: Selecting Images in Bridge
Step 1: Select the images you wish to merge into a HDR image. In this example, the top row of five images has been selected.
It is important that you do not allow ACR (Adobe Camera Raw) to automatically adjust the image brightness/exposure values as this will decrease the available tonal range of the HDR image. To make sure this doesn't happen, either turn off ACR for jpegs or process them by selecting the default exposure/brightness values of zero. Do this before merging the images in HDR.
Photo by misterken
10 of 36
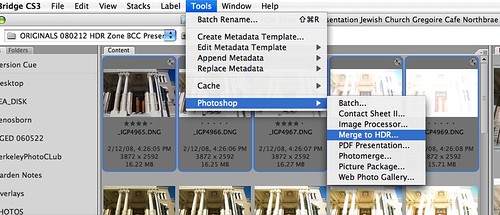
Step 2: Merge to HDR
Step 2: In Bridge CS3, select Tools>Photoshop>Merge to HDR
Photo by misterken
11 of 36
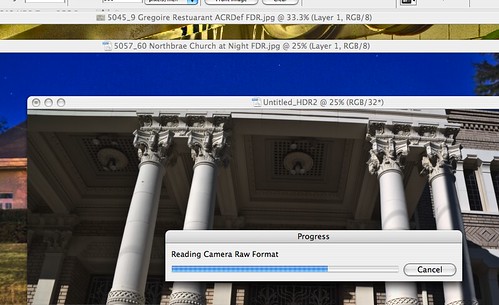
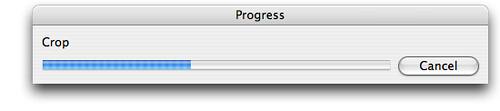
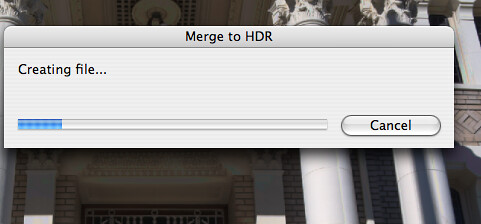
Step 3: Wait
Step 3: In this step, you do nothing but watch the process, have a cup of coffee, or read your email. This step and its stages will take a few minutes. the next few screens show the stages in the HDR progress.
Photo by misterken
12 of 36
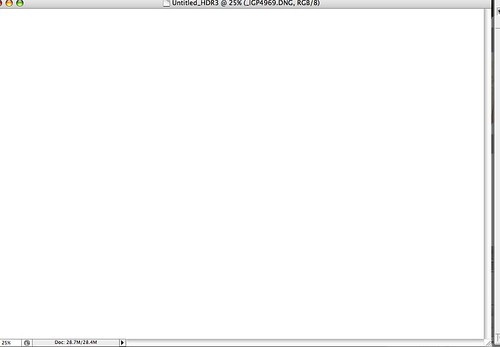
Step 3B: This Page Intentionally Blank
Don't worry if a blank screen shows up. It's part of the HDR generation process.
Photo by misterken
13 of 36
Step 3C: Reading Camera Raw Format
You will get this notice for each of the images being merged.
Photo by misterken
14 of 36
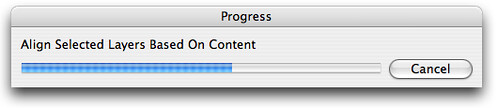
Align Selected Layers Based on Content
This is still step 3.... keep watching.
Here is where having used a tripod will pay off when CS3 aligns the individual images.
Photo by misterken
15 of 36
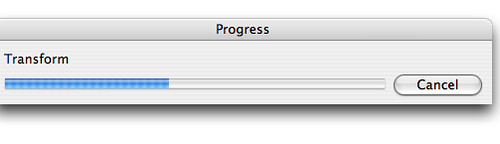
Step 3E: Transform
If the alignment is not exact, a transform function will appear..
Photo by misterken
17 of 36
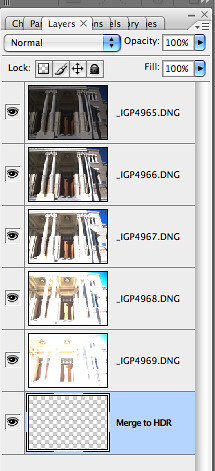
Progress With Layers Panel
As the merging proceeds, the layers panel will show what images have been processed. In this example, the five separate exposures will be combined into a single 32 bit image.
Photo by misterken
18 of 36
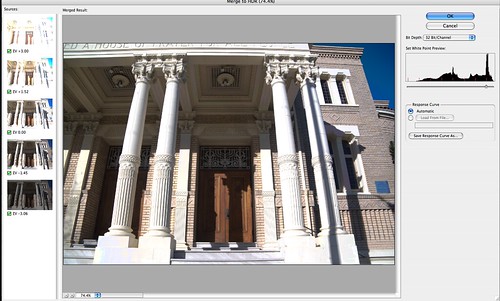
Step 4: Merged to 32 Bit HDR Image
Step 4: Now that you have your exposures merged to a single 32 bit image, you can click OK to go to the next step or view the full 32 bit range using the histogram slider. Once you've finished viewing the image, mouse-click OK to continue.
Photo by misterken
19 of 36
Step 4C: Creating File Merge to HDR
I hope you selected 'OK' in the last step. If not, you won't see this final step in the file merge to HDR.
Photo by misterken
20 of 36
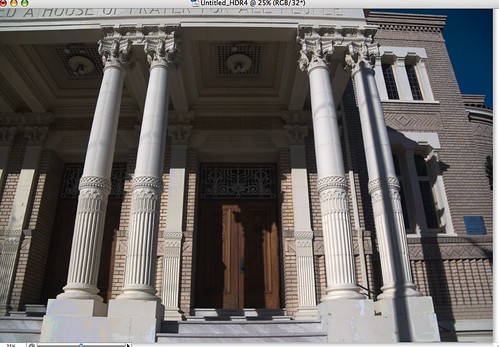
Step 5: 32 Bit HDR Image
Step 5: Just look at your image for awhile to figure out what you want to do next because this is what you will post-process in Photoshop.
Photo by misterken
21 of 36
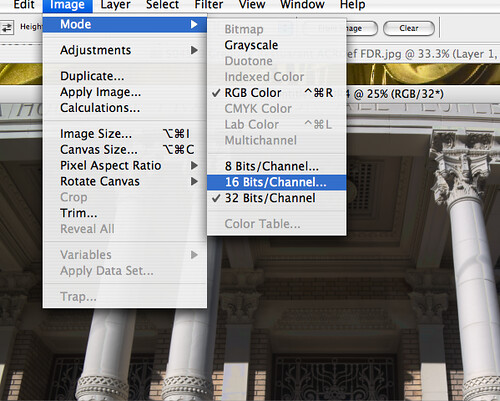
Step 6: Convert from 32 to 16 bit
Step 6: To use Curves and other Photoshop adjustments, convert the 32 bit HDR image to 16 bit mode. You can go to 8 bit, but will have more to work with as a 16 bit image (for now).
Photo by misterken
22 of 36
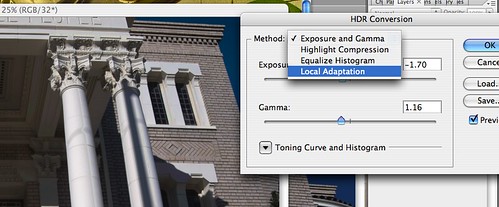
Step 7: Selecting Local Adaptation from HDR Conversion
Step 7: After converting the image from 32 bit to 16 bit, you will be presented with four options for completion of the HDR conversion: Exposure and Gamma; Highlight compression; Equalize Histogram: and Local Adaptation. I recommend the Local Adaptation as it provides the greatest control.
Select Local Adaptation and then click the small triangle opposite the Toning Curve and Histogram line.
Photo by misterken
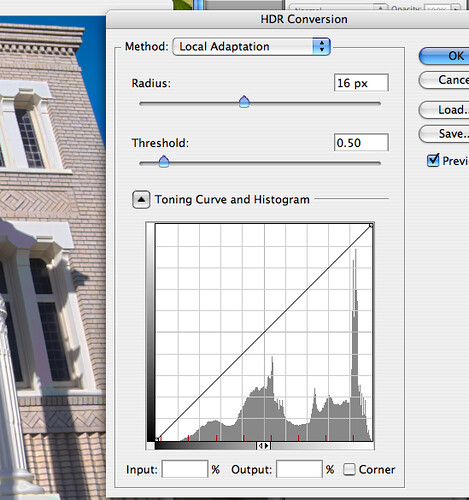
23 of 36
Step 8: Toning Curve and Histogram
Step 8: If the Toning Curve and Histogram do not display, mouse-click the arrow in the box to the left of Toning Curve and Histogram. Ignore Radius and Threshold which don't work in Local Adaptation.
Photo by misterken
25 of 36
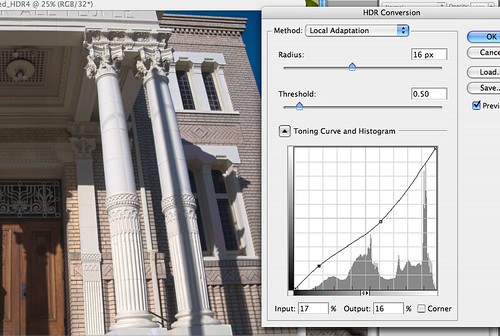
Step 10: Save It or Post Process It
Step 10: Admire your completed HDR image. You can now save it as a TIFF, convert it to 8 bit and save as a jpeg, or continue with Shadow/Highlights or other post-processing as the muse leads you.
The next few slides in this series show some more examples of HDR images, HDR images processed with Shadow/Highlights, and HDR images using FDR Tools rather than Photoshop. There will be a future tutorial on Shadow/Highlights.
Photo by misterken
26 of 36
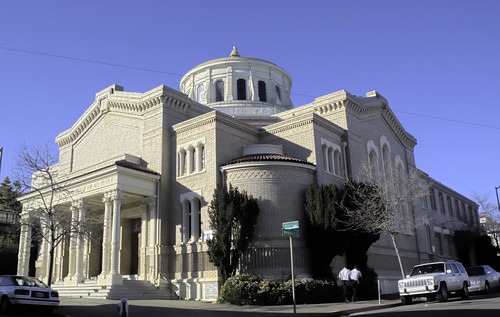
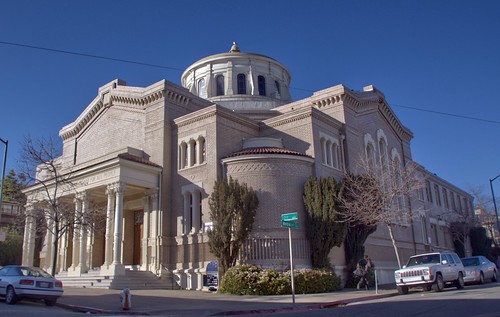
5001_4 Temple Sinai HDR
This image is an HDR from 5 exposures using the process outlined for 'Columns and Doors' starting here. To see what Shadow/Highlights does to this image go here.
Photo by misterken
27 of 36
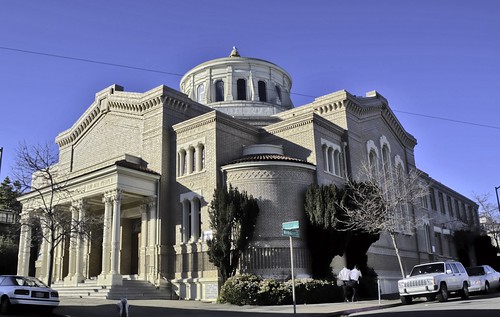
5001_4 Temple Sanai HDR SH
Once an HDR image is generated, you can bring out further detail using Shadow/Highlights, as in this image, which started with this HDR image.
Photo by misterken
28 of 36
5003 Temple Sanai ACR BSE
This image is from a single exposure (Iso 100 1/500 f/8) and has been adjusted in ACR for brightness and exposure. Note the difference between this image and the HDR composite.
Photo by misterken
29 of 36
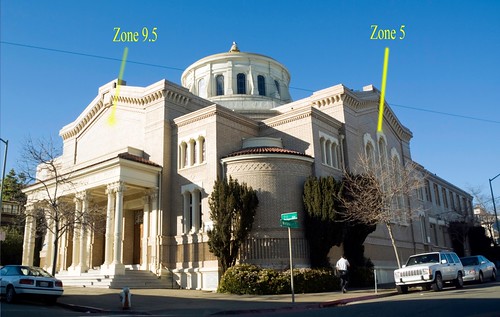
5003 Temple Sinai ACR BSE Zoned
The original scene had a dynamic range that far exceeded what film, a digital camera, or even the human eye can capture. In this image, the brightness values range from Zone 0 (darkest shadows) to Zone 10 (steps). The arch over the center window on the shaded side of the temple is in Zone 5, middle gray (yes, middle gray can appear white). The places the bright 'face' in Zone 9.5, nearly blown out and too bright for my taste. Now compare to the HDR image.
Photo by misterken
30 of 36
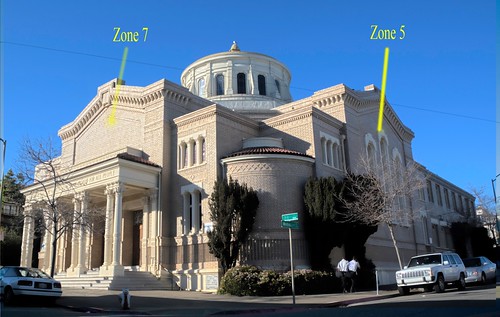
5001_4 Temple Sinai HDR Zoned
In this HDR image, the bright face of the single image has been 'toned down' to Zone 7 while retaining the middle gray Zone 5 in the shaded side. This demonstrates how HDR 'compresses' the brightness range of a scene to bring the important parts into a desired range of values. Of course, if you want the bright side of the temple to be brighter, you can still do that, but with control. Click here to see the metered image in the previous slide.
Photo by misterken
31 of 36
5001_5 Temple Sinai FDR
Photoshop is just one of several software programs that can be used. FDR Tools and Photomatix are two other popular programs. This 'HDR' image was generated using FDR Tools. This was processed to be a bit darker than the other versions, but there is adequate shadow detail which can be seen when viewed large.
Photo by misterken
32 of 36
5001_5 Temple SInai FDR SH
Here, I used Shadow/Highlights to open up the shadow areas without significantly changing the highlights.
Photo by misterken
35 of 36
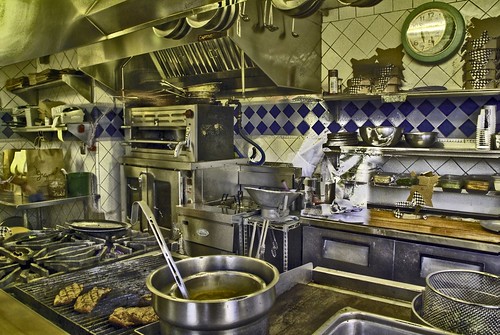
5046_8 Gregoire Restuarant FDR
Same as previous image except individual exposures were not set to the ACR default. If ACR is allowed to automatically adjust the exposure and brightness values, some of the tonal range will be lost.
Photo by misterken