


Cuttlefish Casting Tutorial
Slideshow by Catherine Chandler
A short step-by-step tutorial of simple cuttlefish casting techniques.
14139 views since November 23, 2012.
Get a link button for this slideshow »
Make and share your own slideshow »
1 of 28
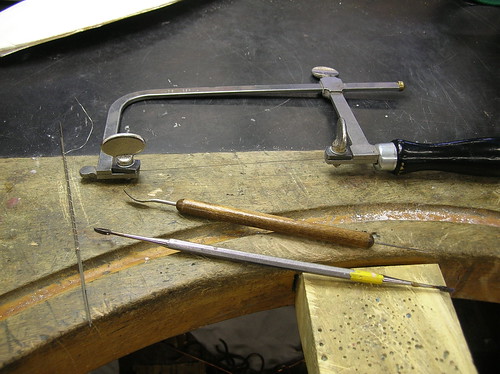
Cuttlefish Casting 01
A few tools you will need:
Jeweler's saw frame & blades
exacto knife
dental tools for carving (clay-working tools work nicely too)
brush or scotch brite
masking tape
steel binding wire
cuttlebone (large)
scrap metal or casting shot
crucible
soldering station
Photo by catherineechandler
2 of 28
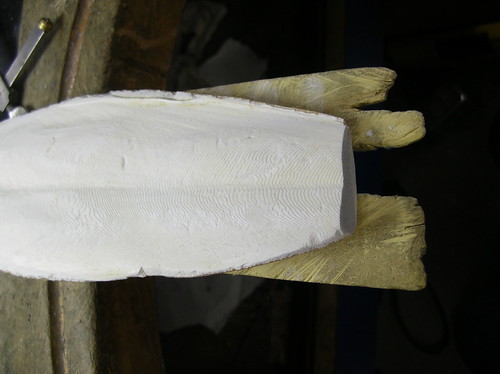
Cuttlefish Casting 02
Here is the cuttlebone I used. There are two sides to a cuttlefish bone--a soft side, and a hard side with a shell. The soft side will be the one you are carving into, which is shown here.
Photo by catherineechandler
4 of 28
Cuttlefish Casting 04
Hard side of the cuttlefish bone. Notice the cracked parts. I decided to use this even though it had some cracks in the shell because I figured it would still be thick enough not to burn through when I poured the metal into it.
Photo by catherineechandler
5 of 28
Cuttlefish Casting 05
First you want to cut the two pointed ends off of your cuttlebone with your jeweler's saw. Proceed gently with this--you don't want to crack the bone further.
Photo by catherineechandler
6 of 28
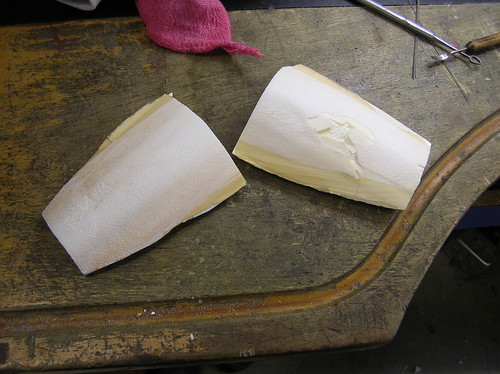
Cuttlefish Casting 06
Next you want to saw your cuttlebone in half, width-wise.
Photo by catherineechandler
7 of 28
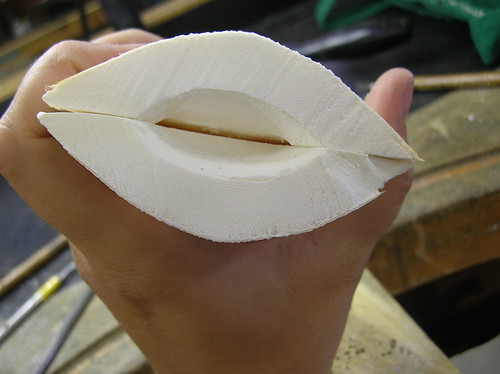
Cuttlefish Casting 07
This is how they look together after the initial cut. The two soft sides are facing each other. Due to the curves in the bone, we cannot simply carve into them like this.
You will now need to either rub these two sides together over a trash can to make them flat against each other, OR, you can rub them on sanding paper on a table. Make sure your flat surface area is big enough for the piece you want to carve into the bone, with some room around the edges.
Photo by catherineechandler
9 of 28
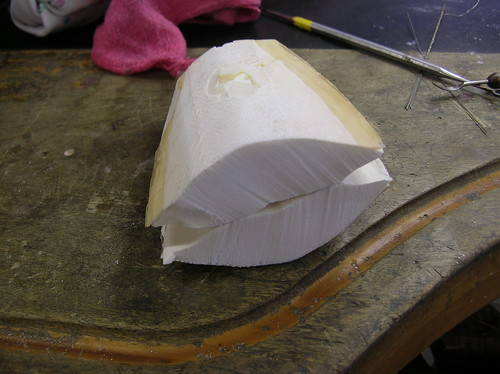
Cuttlefish Casting 09
After sanding the two pieces flat. They now sit flush against each other.
Photo by catherineechandler
10 of 28
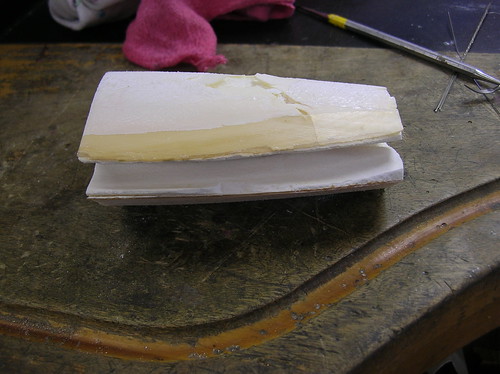
Cuttlefish Casting 10
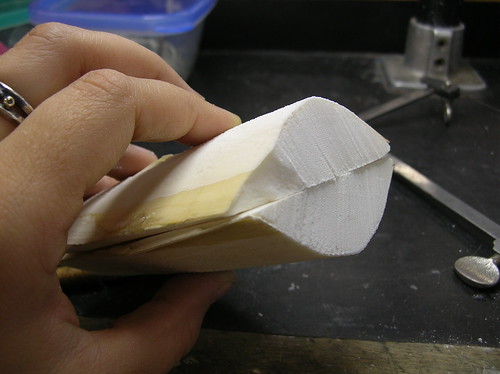
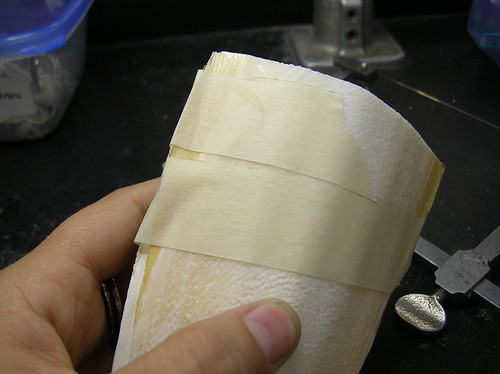
Now, making sure the tops of the cuttlefish bones are even, wrap some masking tape around the bones to hold them together.
Photo by catherineechandler
11 of 28
Cuttlefish Casting 11
Using a carving tool, pencil, or exacto knife, draw a line for the portal that you will be pouring your metal into. Make sure you make it big enough to pour into--otherwise your metal will cool too much while trying to make it's way into the hollow space inside.
Photo by catherineechandler
12 of 28
Cuttlefish Casting 12
Carve out the portal so that it forms a funnel to the inside.
Photo by catherineechandler
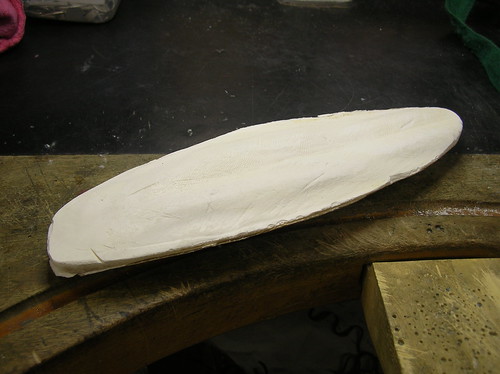
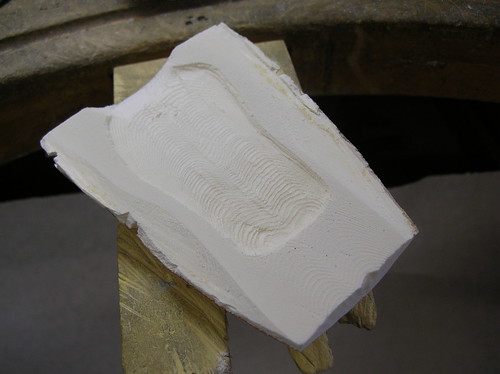
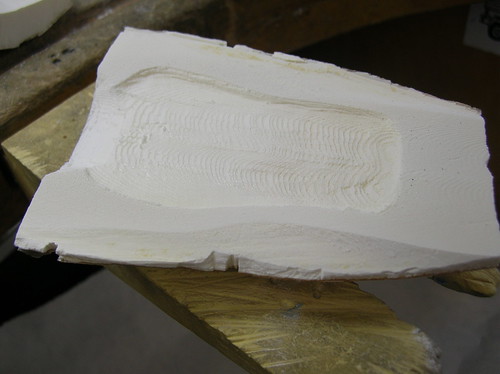
14 of 28
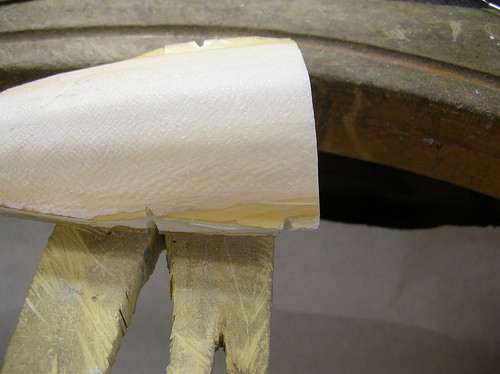
Cuttlefish Casting 14
This is how your portal should look--wide on the top, and funneling to the carving inside. Now, you can carve your inside shape before forming the portal, or vice versa. This actually shows the portal AFTER I've finished the carving inside, but I did do the portal first so that I would know where my lines should go.
Photo by catherineechandler
15 of 28
Cuttlefish Casting 15
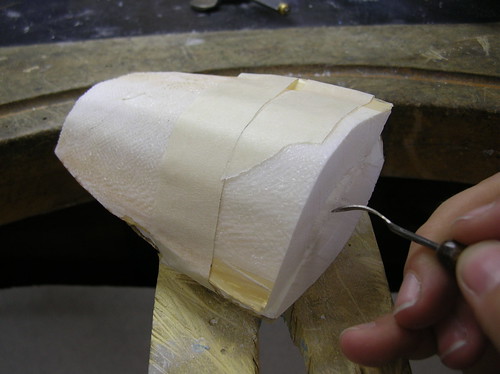
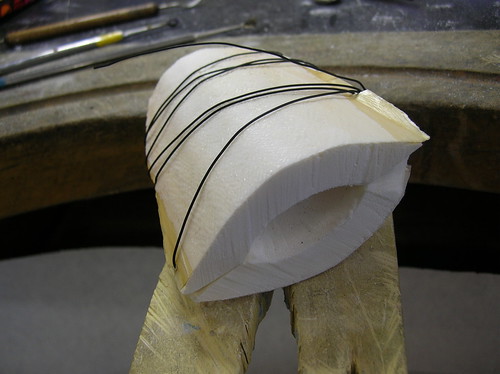
Carve about 3 notches into the sides of your cuttlebone with your jeweler's saw. These will later serve as guides for the binding wire.
Photo by catherineechandler
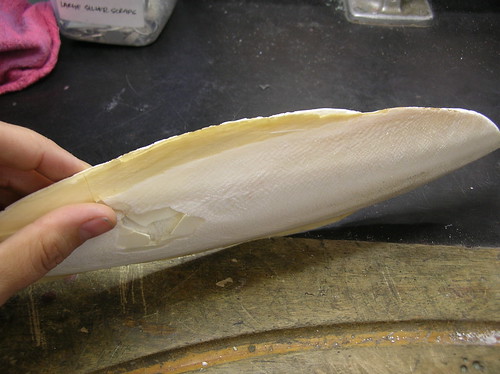
16 of 28
Cuttlefish Casting 16
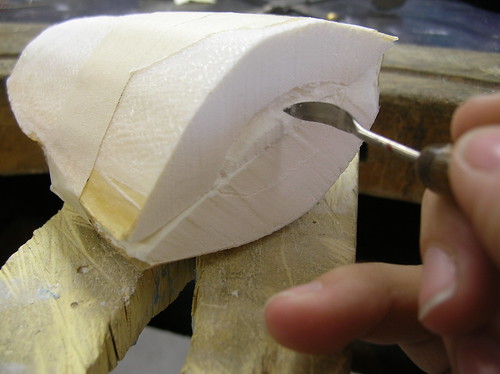
I decided to just make a sheet of cuttlefish cast metal, so that I could later fabricate it. I have, in the past, tried to cast rings within the cuttlefish, but with little success. For my sheet, I only carved into one side of the cuttlefish bone--a thin carving into the thicker of the two sides.
Photo by catherineechandler
17 of 28
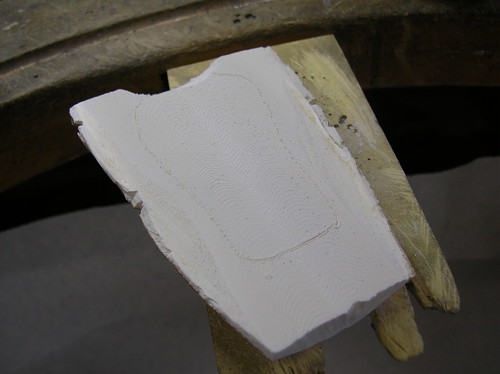
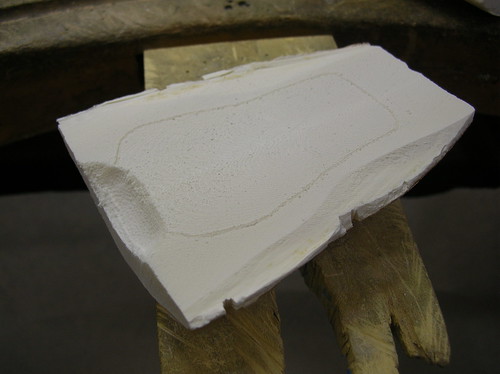
Cuttlefish Casting 17
You initially want to draw a line into the cuttlebone, and then use your dental or clay working tools to carve out the bone.
Photo by catherineechandler
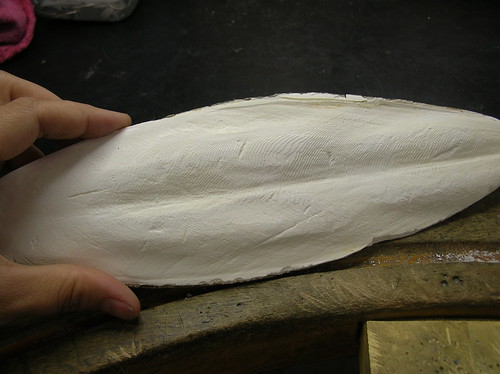
20 of 28
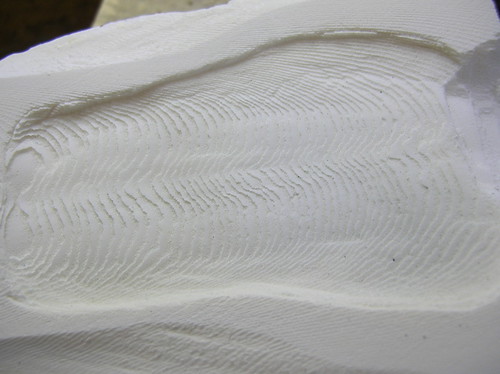
Cuttlefish Casting 20
Detail of carved section. The wonderful thing about cuttlebone is the grain that you get in the casting process. You can enhance this by using a really soft, light brush, to brush away any dust from the carving process.
Photo by catherineechandler
21 of 28
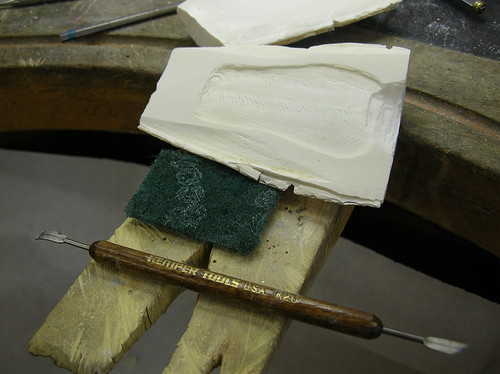
Cuttlefish Casting 21
My tools for carving. I didn't have a brush, so lightly brushed the carved area with scotch brite to bring up the grain.
Photo by catherineechandler
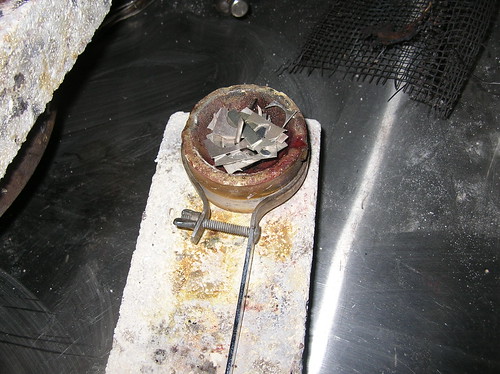
22 of 28
Cuttlefish Casting 22
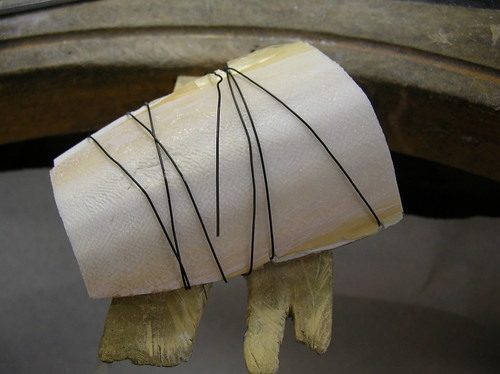
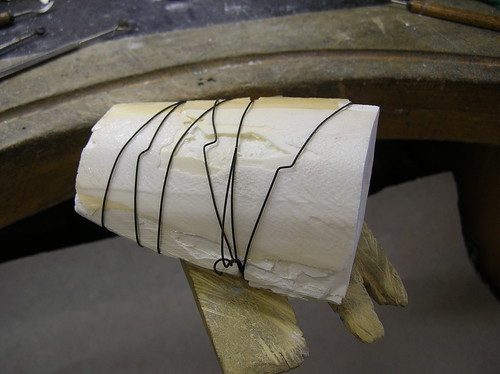
Put both halves back together and wrap securely with binding wire.
Photo by catherineechandler
24 of 28
Cuttlefish Casting 24
Take your flat pliers, and make little twists in the binding wire to tighten it.
Photo by catherineechandler
25 of 28
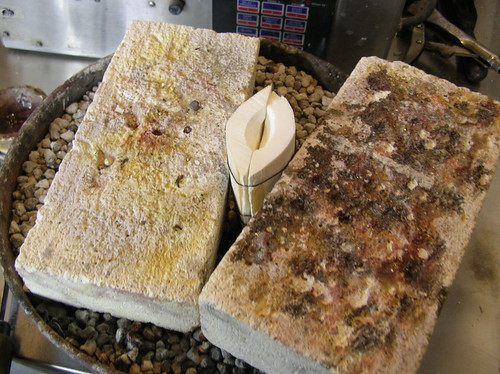
Cuttlefish Casting 25
Secure your cuttlebone between two or three soldering blocks so that it is standing and will not fall over during the pour.
Photo by catherineechandler
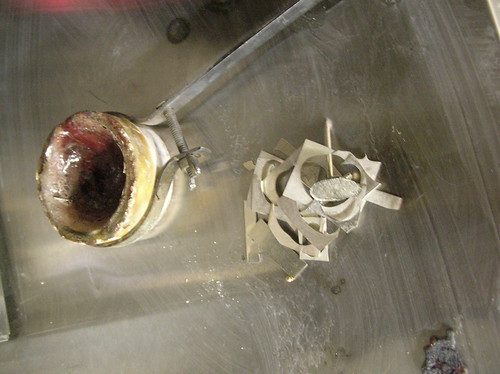
26 of 28
Cuttlefish Casting 26
This is the tricky part--figuring out how much metal you'll need. It's a guessing game, really. Whatever doesn't go into the cuttlebone can be re-heated and poured into an ingot or into water for casting shot or water cast pieces.
My metal is usually a 50/50 mixture of scrap sheet ("new" metal) and cast metal.
Photo by catherineechandler
27 of 28
Cuttlefish Casting 27
Silver in the crucible. I was unable to photograph the pouring process, but what you want to do is this:
Heat up crucible with torch prior to adding metal.
Add metal, carefully, and a pinch of casting flux.
Heat up metal with a large, hot flame. If this is your first time casting, I suggest watching a video to get a good idea of the process.
Once metal is molten, keep the flame on it and pour slowly (not too slowly) into the cuttlebone while keeping the flame on the pouring metal.
Don't quence the cuttlebone--allow it to cool for a while. Use TONGS to quench it in water before removing the cast metal. Throw out the cuttlebone (they're not reusable) and recycle the binding wire.
Photo by catherineechandler
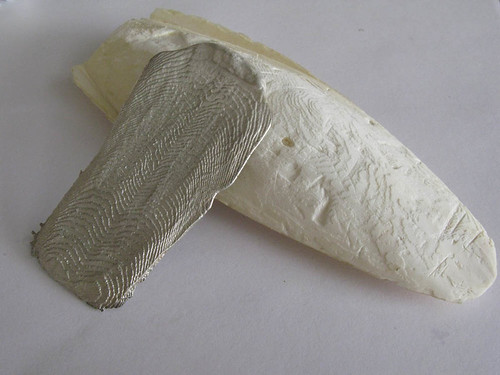
28 of 28
Cuttlefish Casting 28
Here is the resulting sheet of metal!!! I'm very happy mine worked. I knew that because it was a long thin sheet it might not come out, but it turns out my casting experience has paid off well.
Photo by catherineechandler